Soil Blocking 101
What is Soil Blocking?
Simply put, soil blocking is a method of starting seeds that involves using various tools to form soil “blocks.” The blocks are open on all sides and are not set in a container like a regular seed cell tray is.
Benefits
It seems like it may be a lot of work, so why would anybody choose to use this method for seed starting? Let me tell you!
Healthier Plants
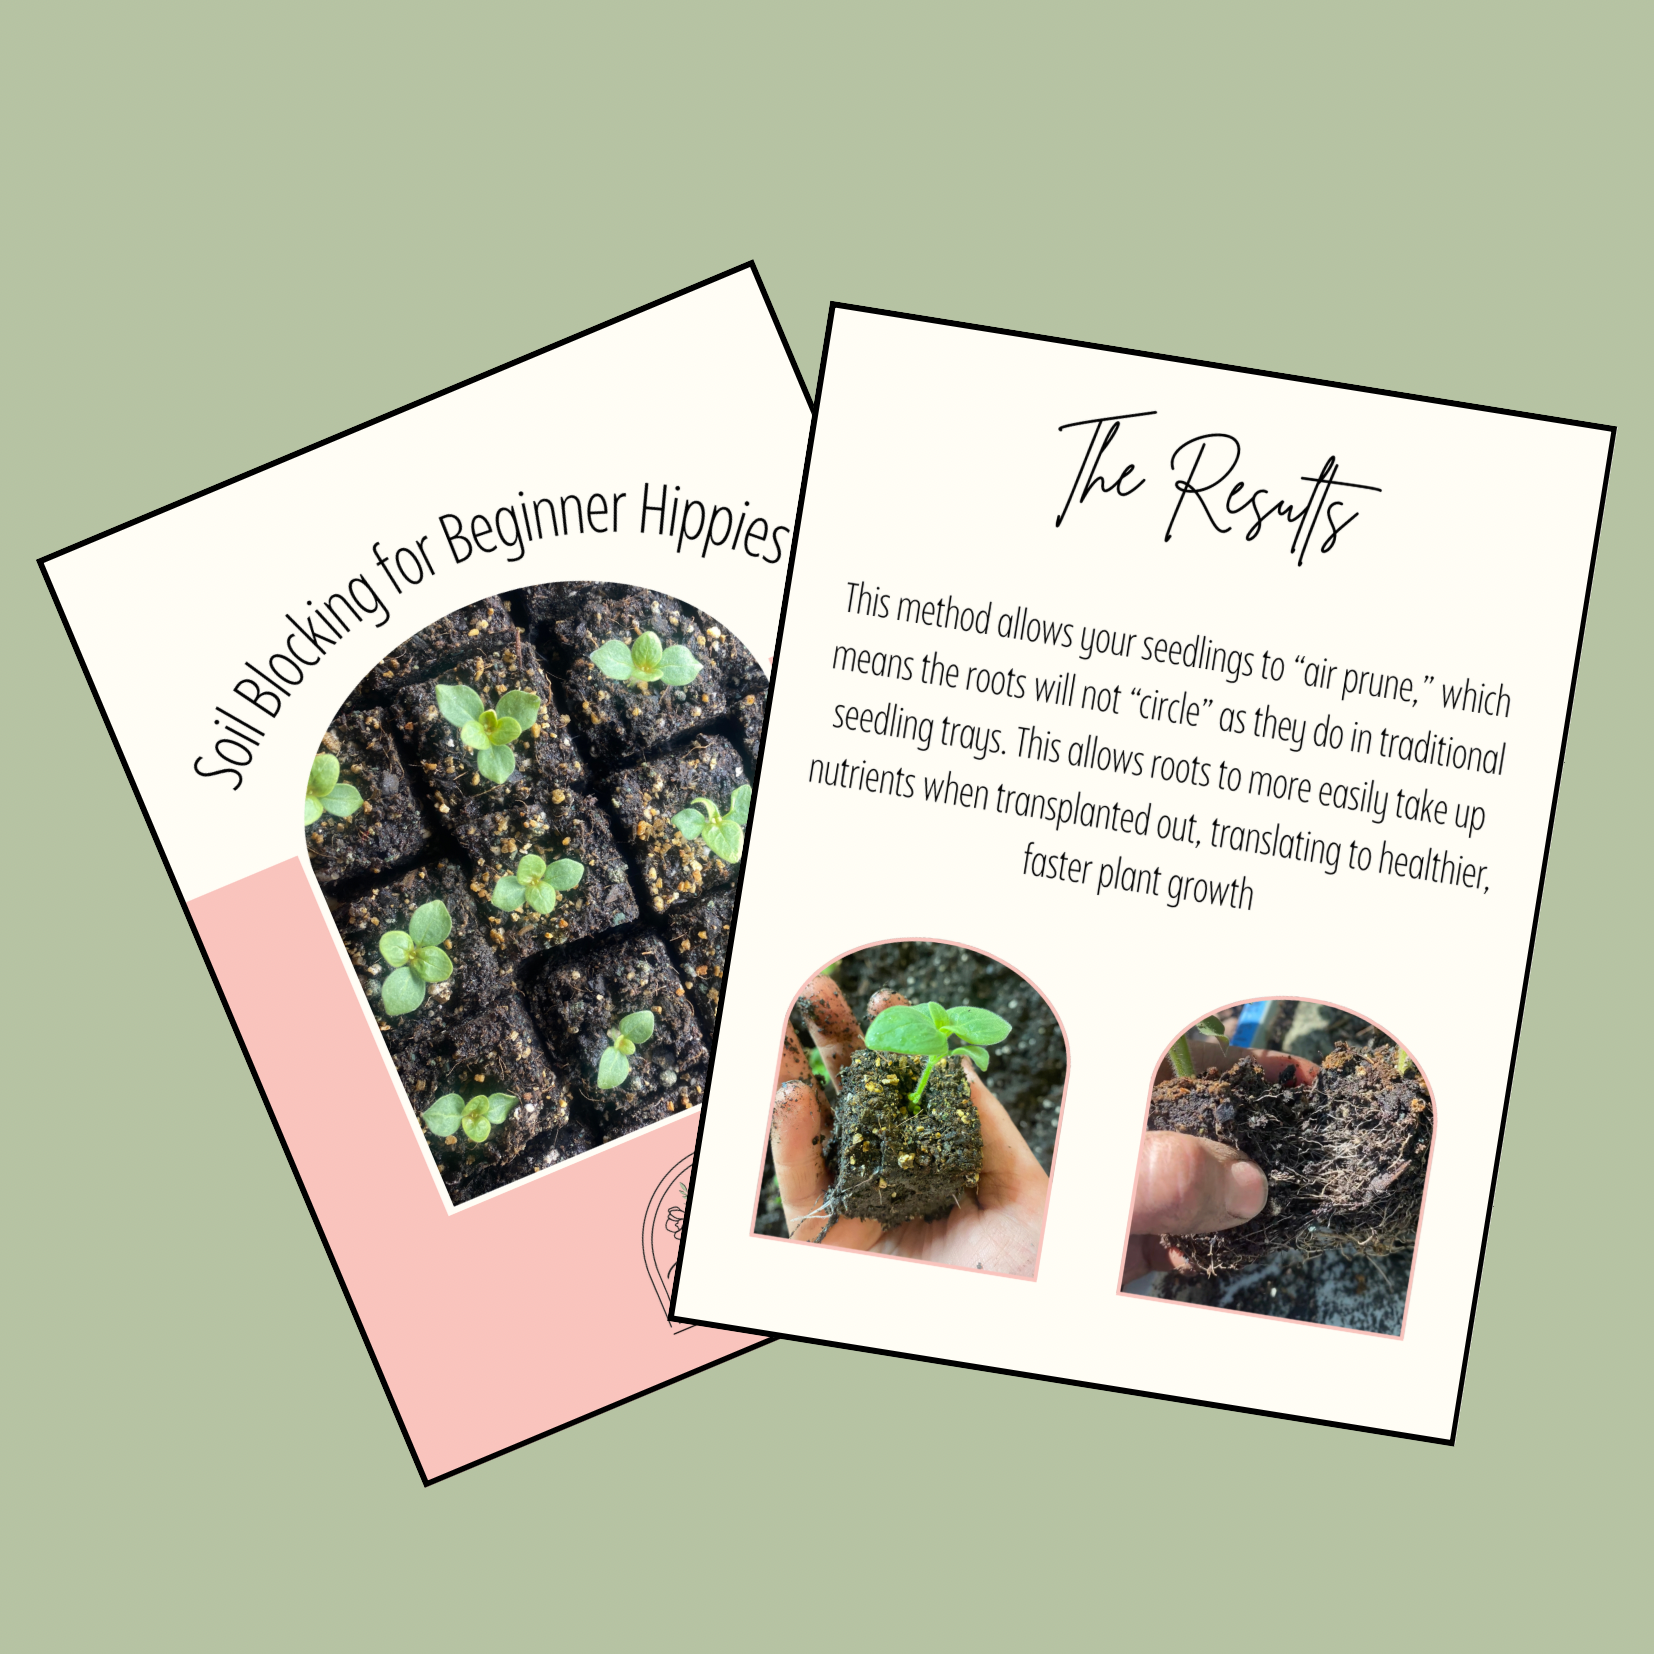
Overall, soil blocking allows for healthier, sturdier seedlings. One of the main functions of the block is to “air prune” the plants’ roots or stop the roots from growing longer than what the block can contain. When seeds are started in plug trays, the roots continue to grow and form a tighter root ball. This is sometimes called “circling.” This makes it difficult for plants to spread their roots and uptake soil nutrients when planted out. Alternatively, soil blocks allow roots to stay strong and ready to grow quickly once they’re transplanted.
Because plant roots are so healthy, this theoretically causes less transplant shock. Again, this is because the roots are more ready and able to uptake existing soil nutrients. They don’t have to struggle quite the same way that seedlings coming from cell trays would. Even when soil blocked transplants do experience some transplant shock, they tend to recover even faster.
Again, because their roots are so ready to spread, this can make for faster plant growth. This could theoretically mean not having to start your seeds as early as you would in a cell tray because soil blocked plants will grow at a faster rate and ultimately catch up or surpass cell tray transplants.
Less Plastic Use
While there are many different trays you can acquire for soil blocking, most tend to be made with sturdier plastic or even materials other than plastic. These trays are meant to last a lifetime. Just think, no more fragile cell trays breaking into slivered pieces of plastic every single year. This is also easier on the wallet over time.
Of note, whatever tray you choose does need to be open on the sides. Think cafeteria tray.
Space Saving
Because you’re creating your own soil blocks, you can make them whatever size you want! The “standard” soil block size is 1-1/2” but there are “mini” blocks as small as 3/4.” Though the smaller blocks are a bit more advanced, once you get enough practice, this can save a ton of space for those who are growing on a large scale (such as your friendly Minnesota flower farmer) or for those that like to grow A LOT of food.
It’s Just Fun!
Starting seeds is exciting for most that choose to grow any plants from seed, whether you’re using a cell tray or soil blocks. However, soil blocking does force you to mix your own soil. This may sound like a hindrance, but it is actually the best. You don’t have to physically use your hands to mix the soil but I believe in the power of touching the soil. It feels SO GOOD in the dead of winter. Even if you don’t want to mix your soil by hand, creating the blocks is also quite fun. It reminds me of playing with Play-Doh when I was a kid.
Drawbacks and Considerations
Investments
While you do have to purchase seed starting supplies when you choose to grow in cell trays, the materials you need to start soil blocking MAY be more expensive. That being said, there is always a more economical way to do something. I have chosen to purchase sturdy trays and actual soil blockers because I know I’ll use them for countless seasons to come. If you wanted to give soil blocking a try without making the initial investment in these types of supplies, you certainly can test it out with less permanent supplies first!
Other than your monetary investment, soil blocking does also require a time investment. You’ll get faster over time, but it does take longer to actually make your soil blocks than it might to simply fill a cell tray.
The Learning Curve
Learning something new takes practice. Luckily, once you get the hang of soil blocking, you’re pretty set for the rest of your soil blocking journey.
I’d say one of the bigger learning curves is knowing how to keep your blocks at the appropriate moisture level. Because the blocks are not closed in like a cell tray, they do dry out quicker. That being said, this will vary greatly on your environmental temperature, humidity levels, and the size of your blocks. Once you learn to monitor this and correct any discrepancies, you’re good to go!
How To Get Started
Here is a list of materials you’ll need:
Soil Blocker (optional but much more effective)
Soil mixing tub
Drywall knife (for scarping your blocker or forming your blocks)
A bucket of lukewarm water
Open-sided seedling trays
Soil mix
Step 1: Getting Your Materials Set Up
You’ll want to start with all your materials in one place. Ideally, you’ll have your soil mixed together first so you can measure it into your mixing tub as you go
Step 2: Prep Your Soil Mix
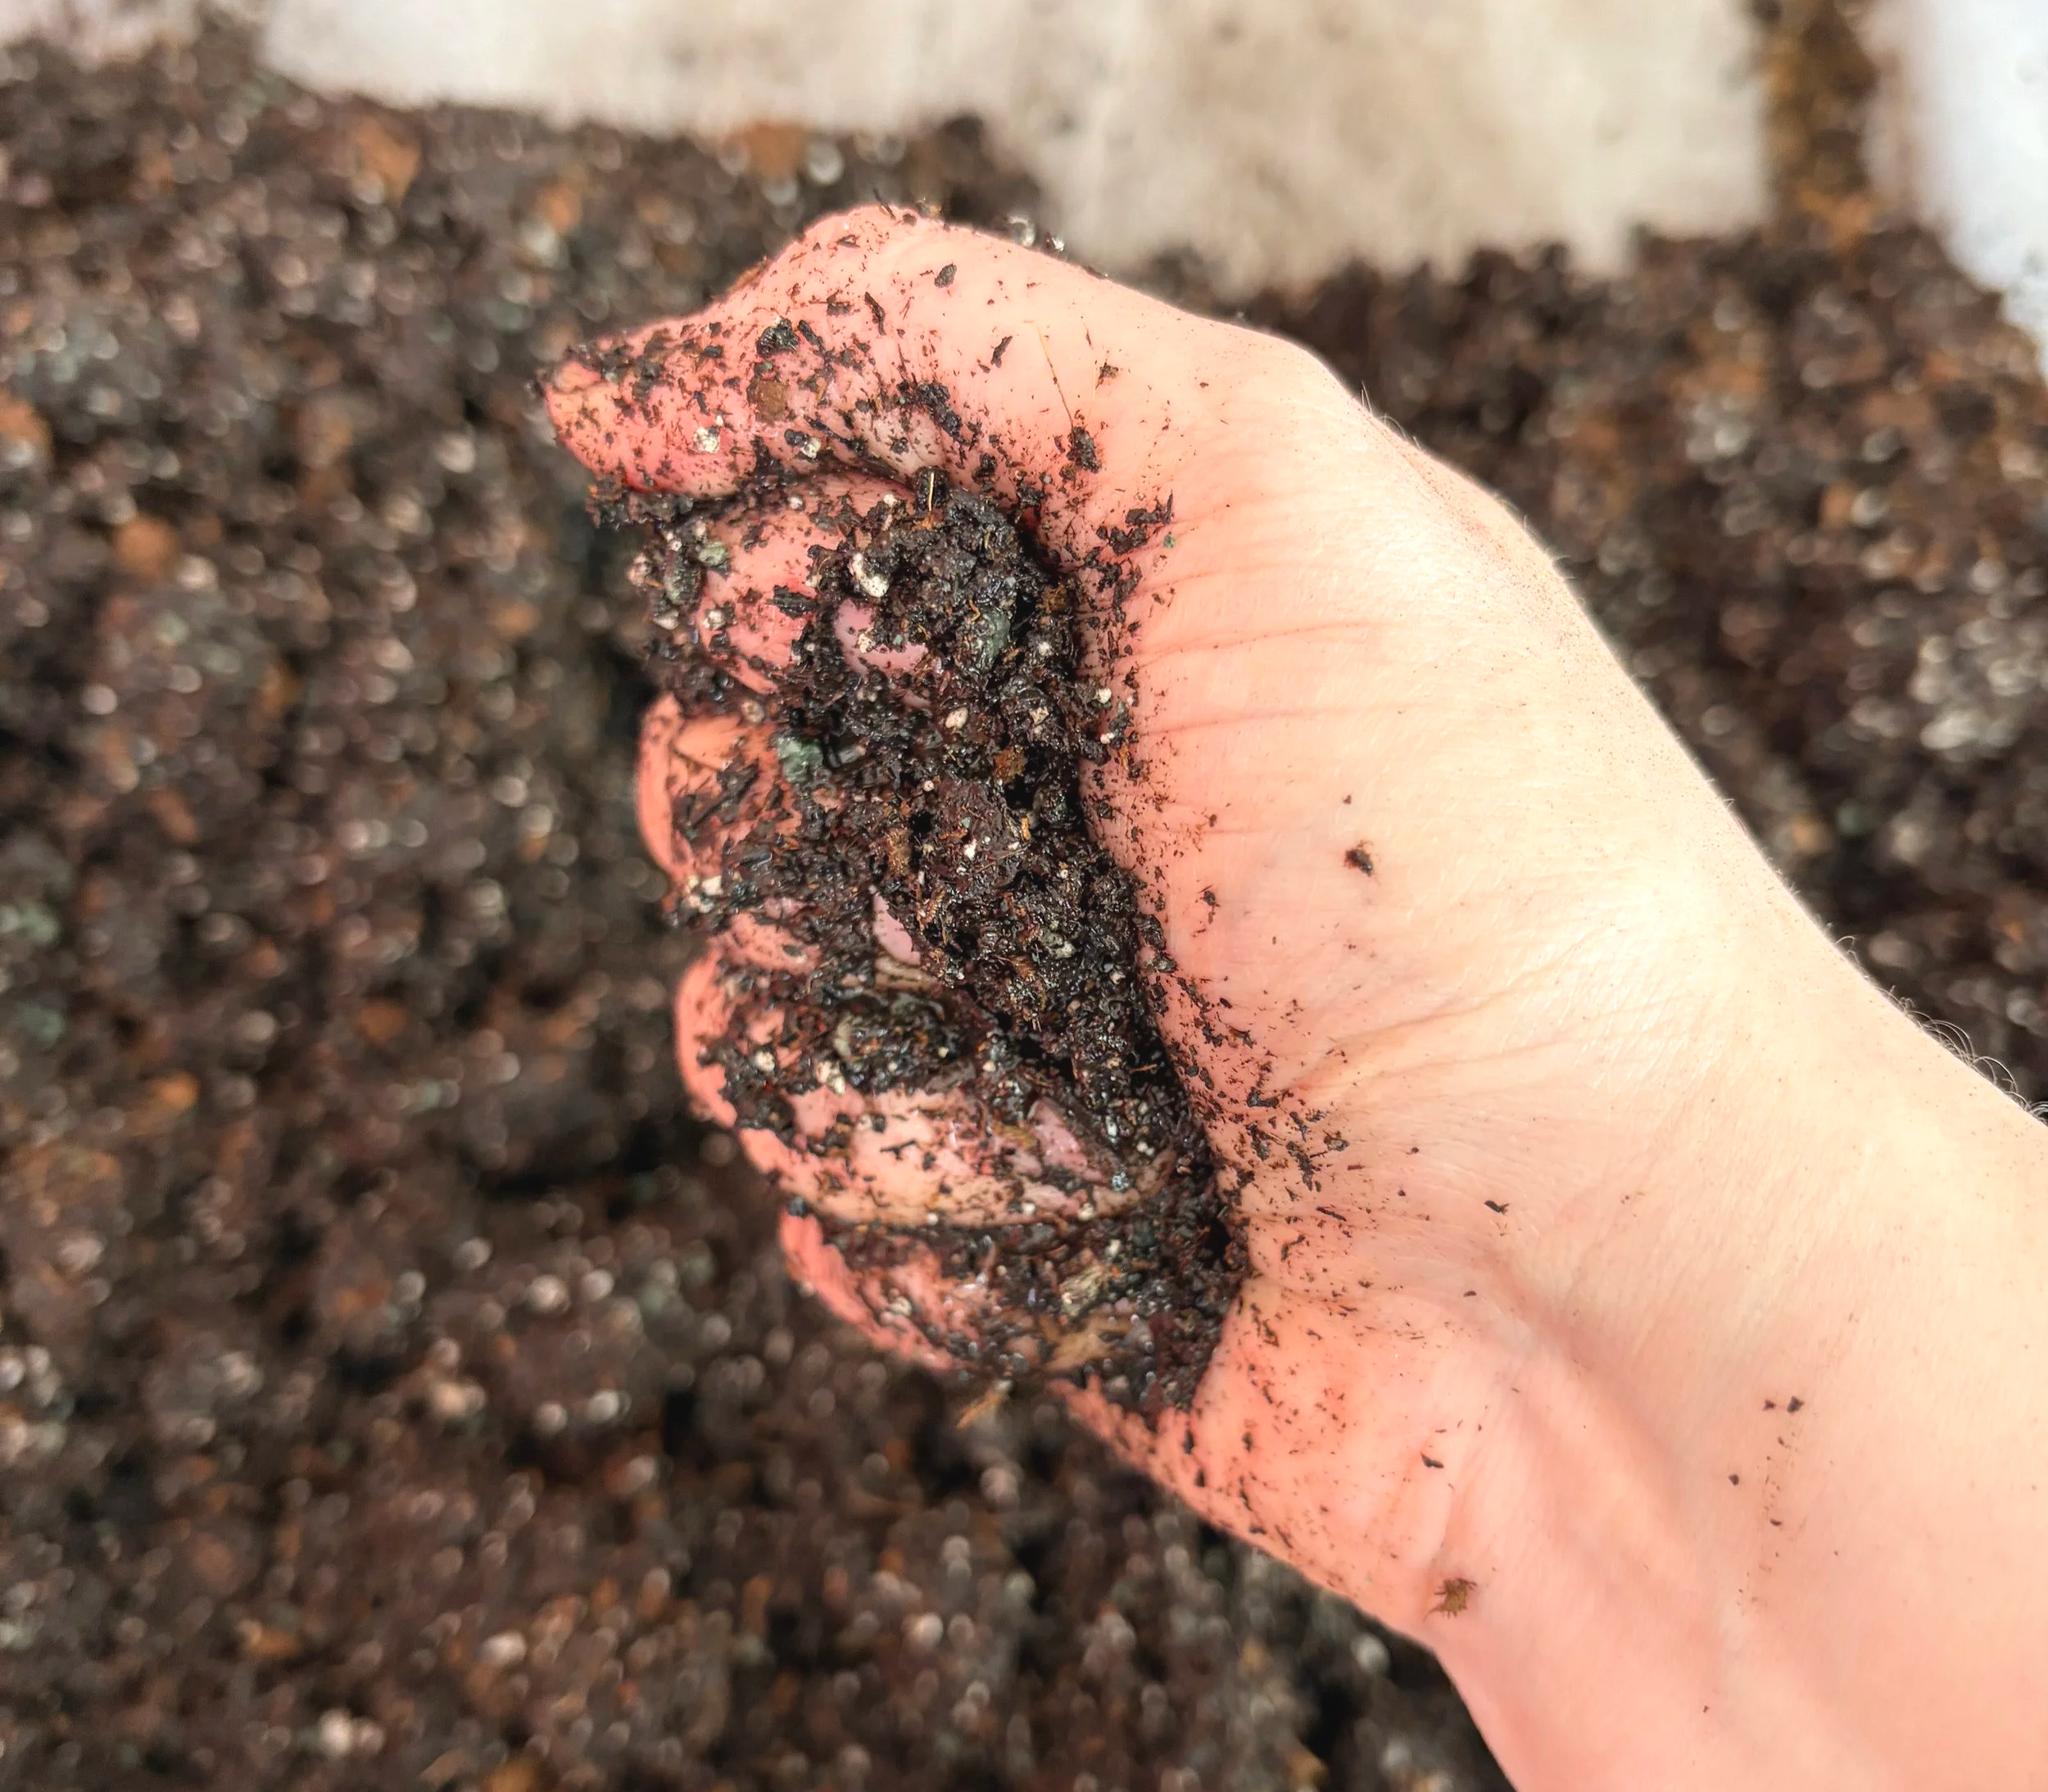
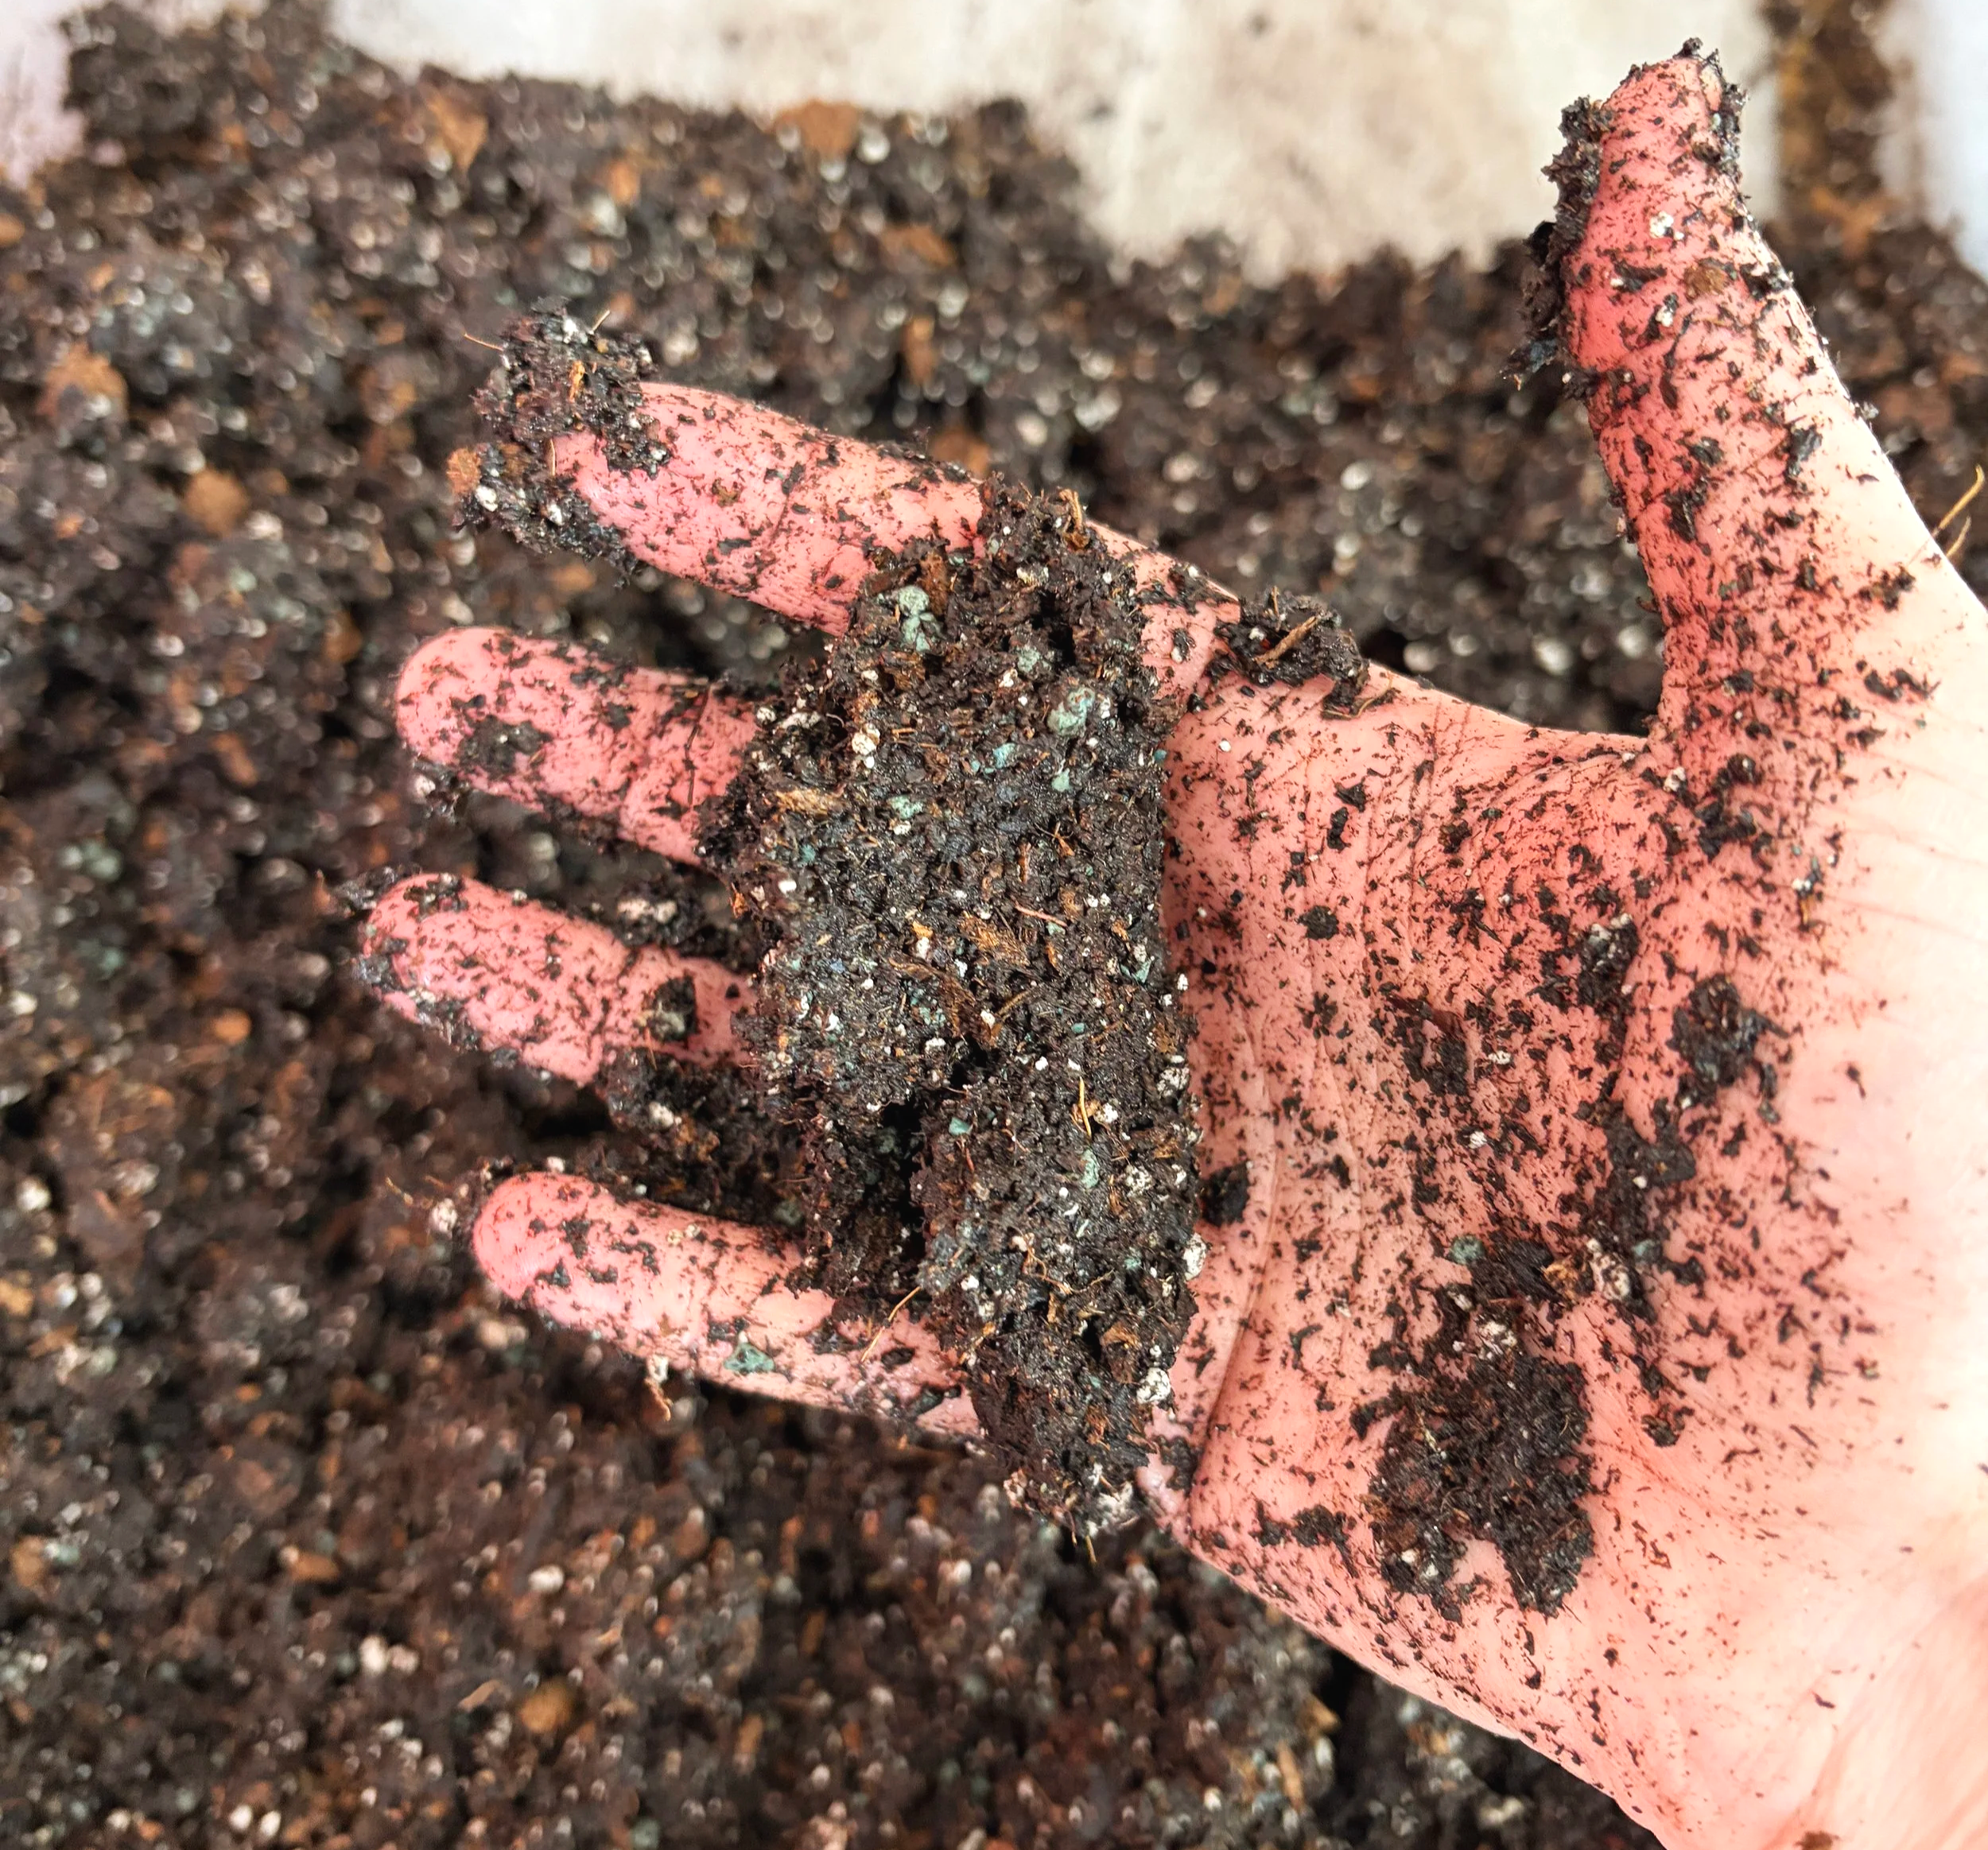
Once all your materials are gathered, mix 2-3 parts soil to 1 part water. I typically use a wide-mouth jar and keep it close by. This way I can add more soil or water as needed. You’ll want your soil mixture to be pretty wet, almost muddy. A good way to know if it is ready is to squeeze some in your fist. Some water should drip out but when you release your grip there should be a nicely formed ball of wet soil in your hand.
Step 3: Make Your Blocks
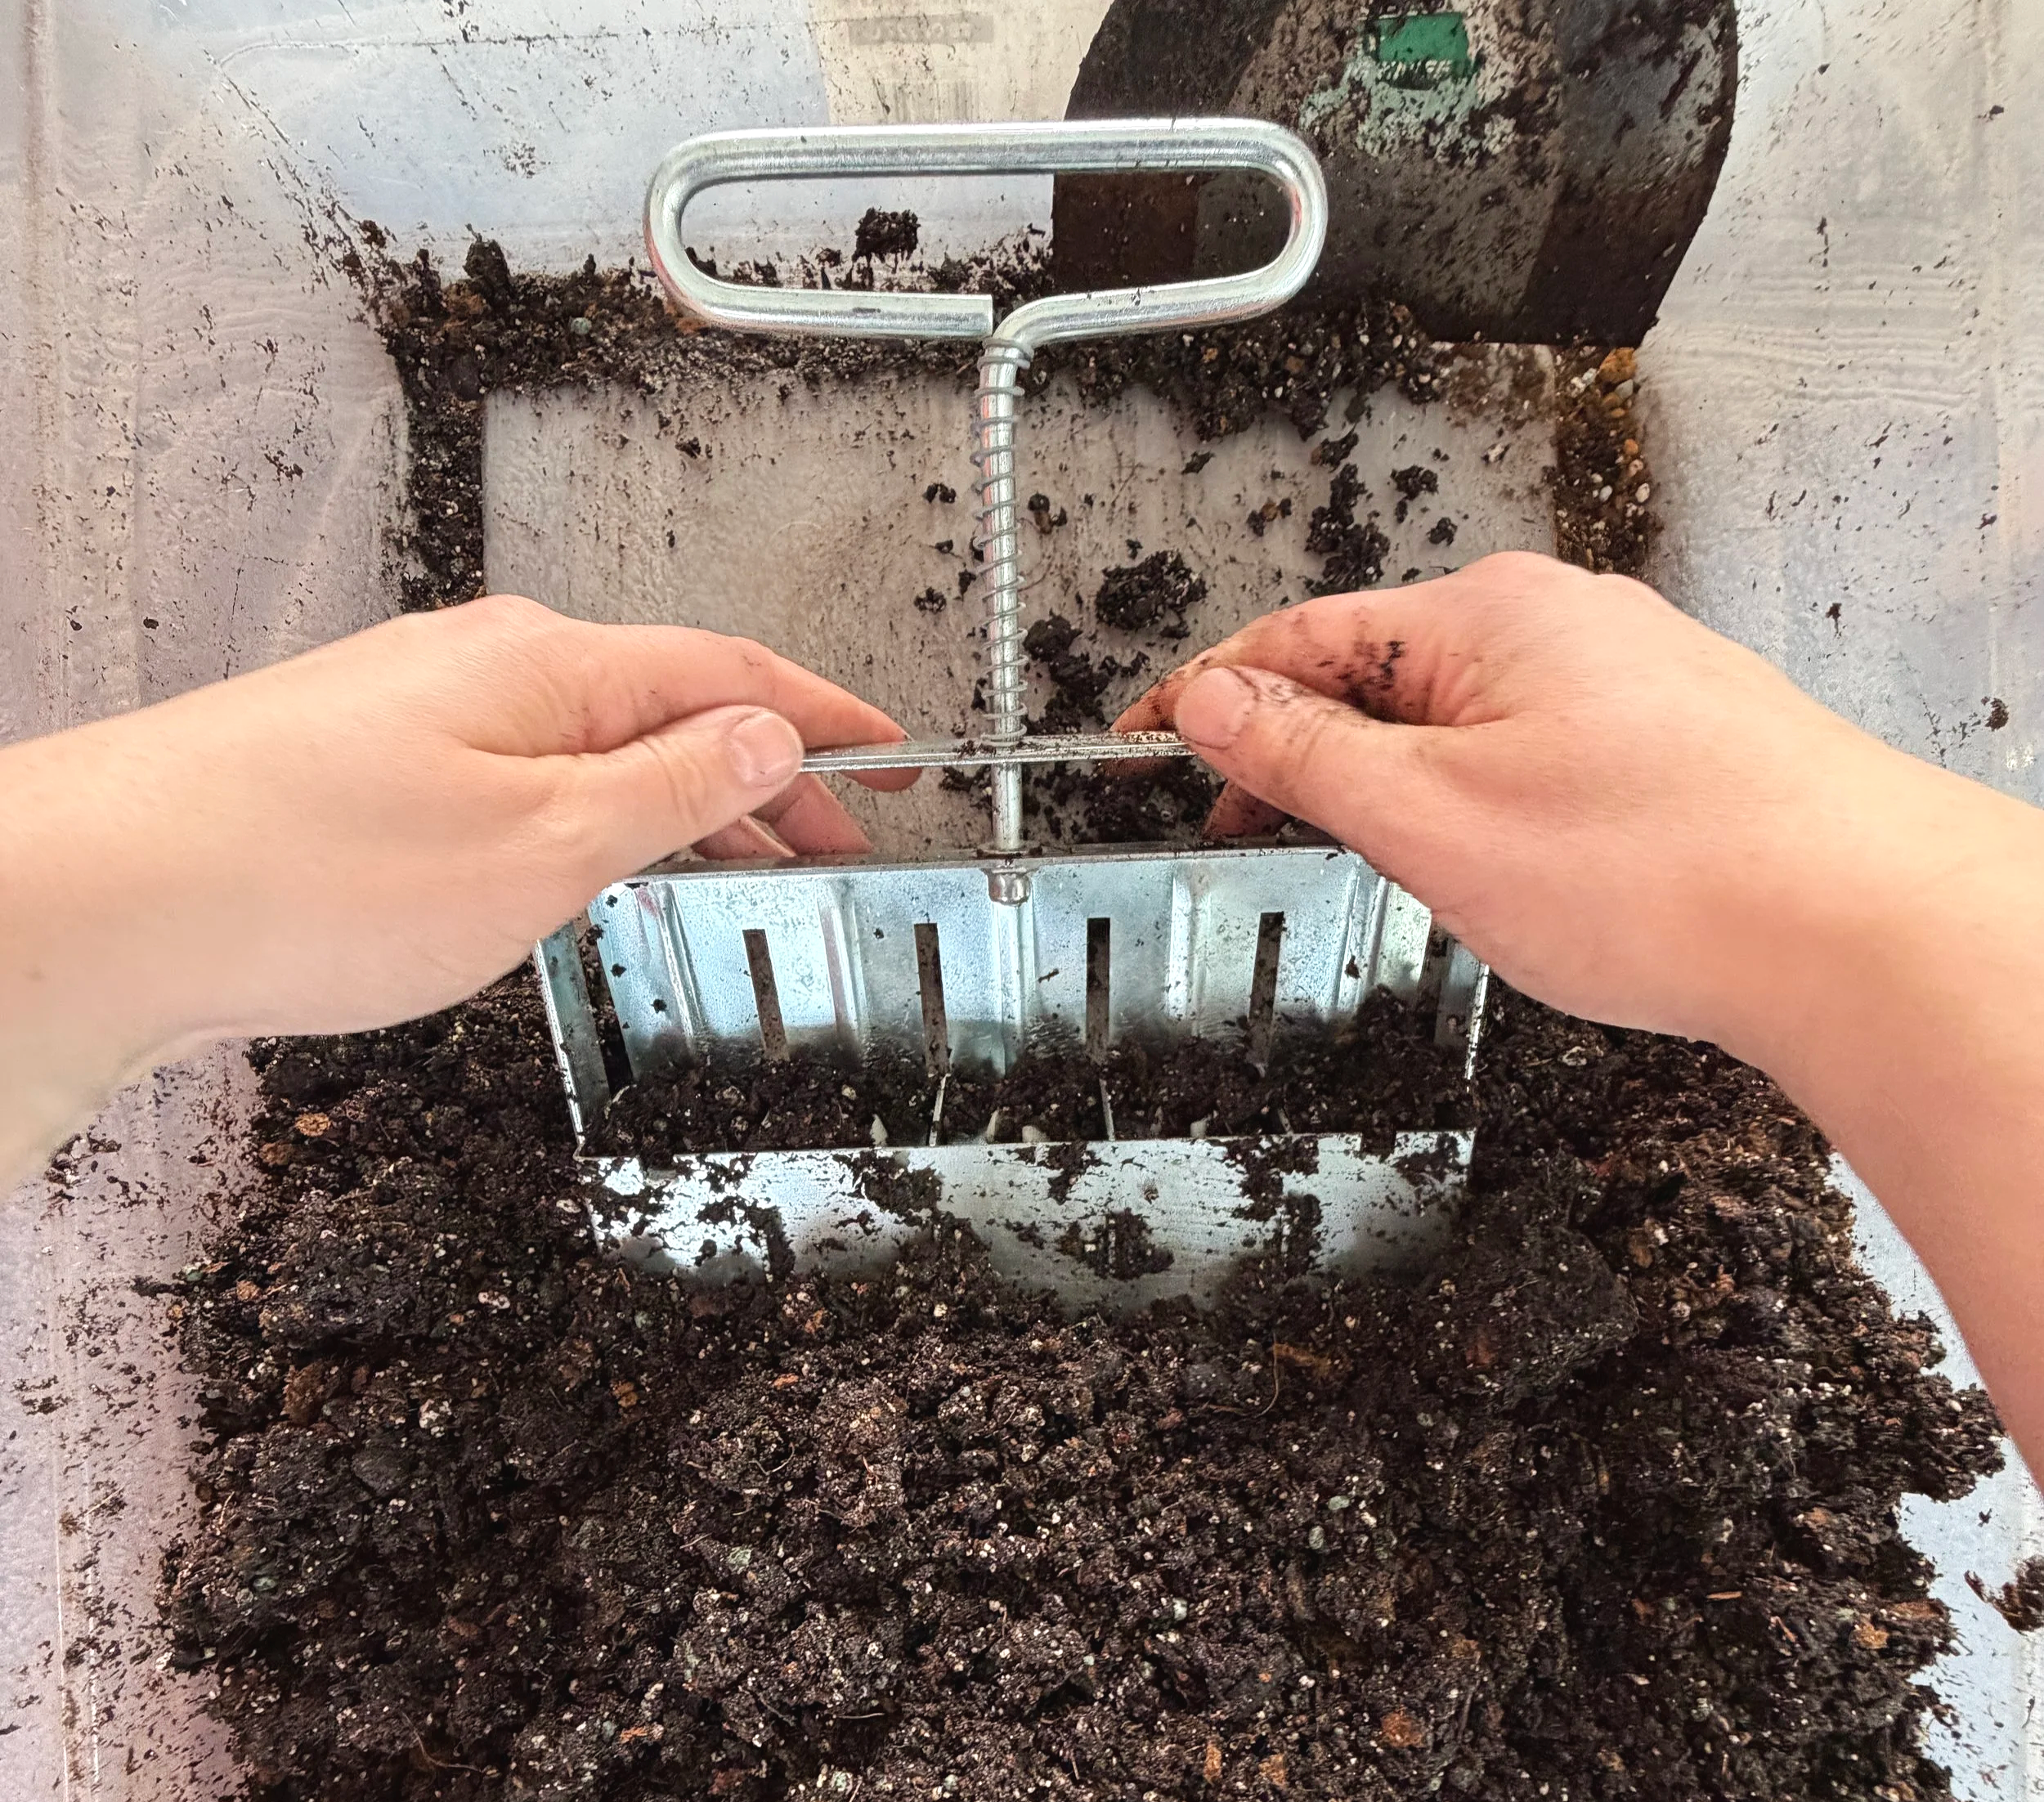
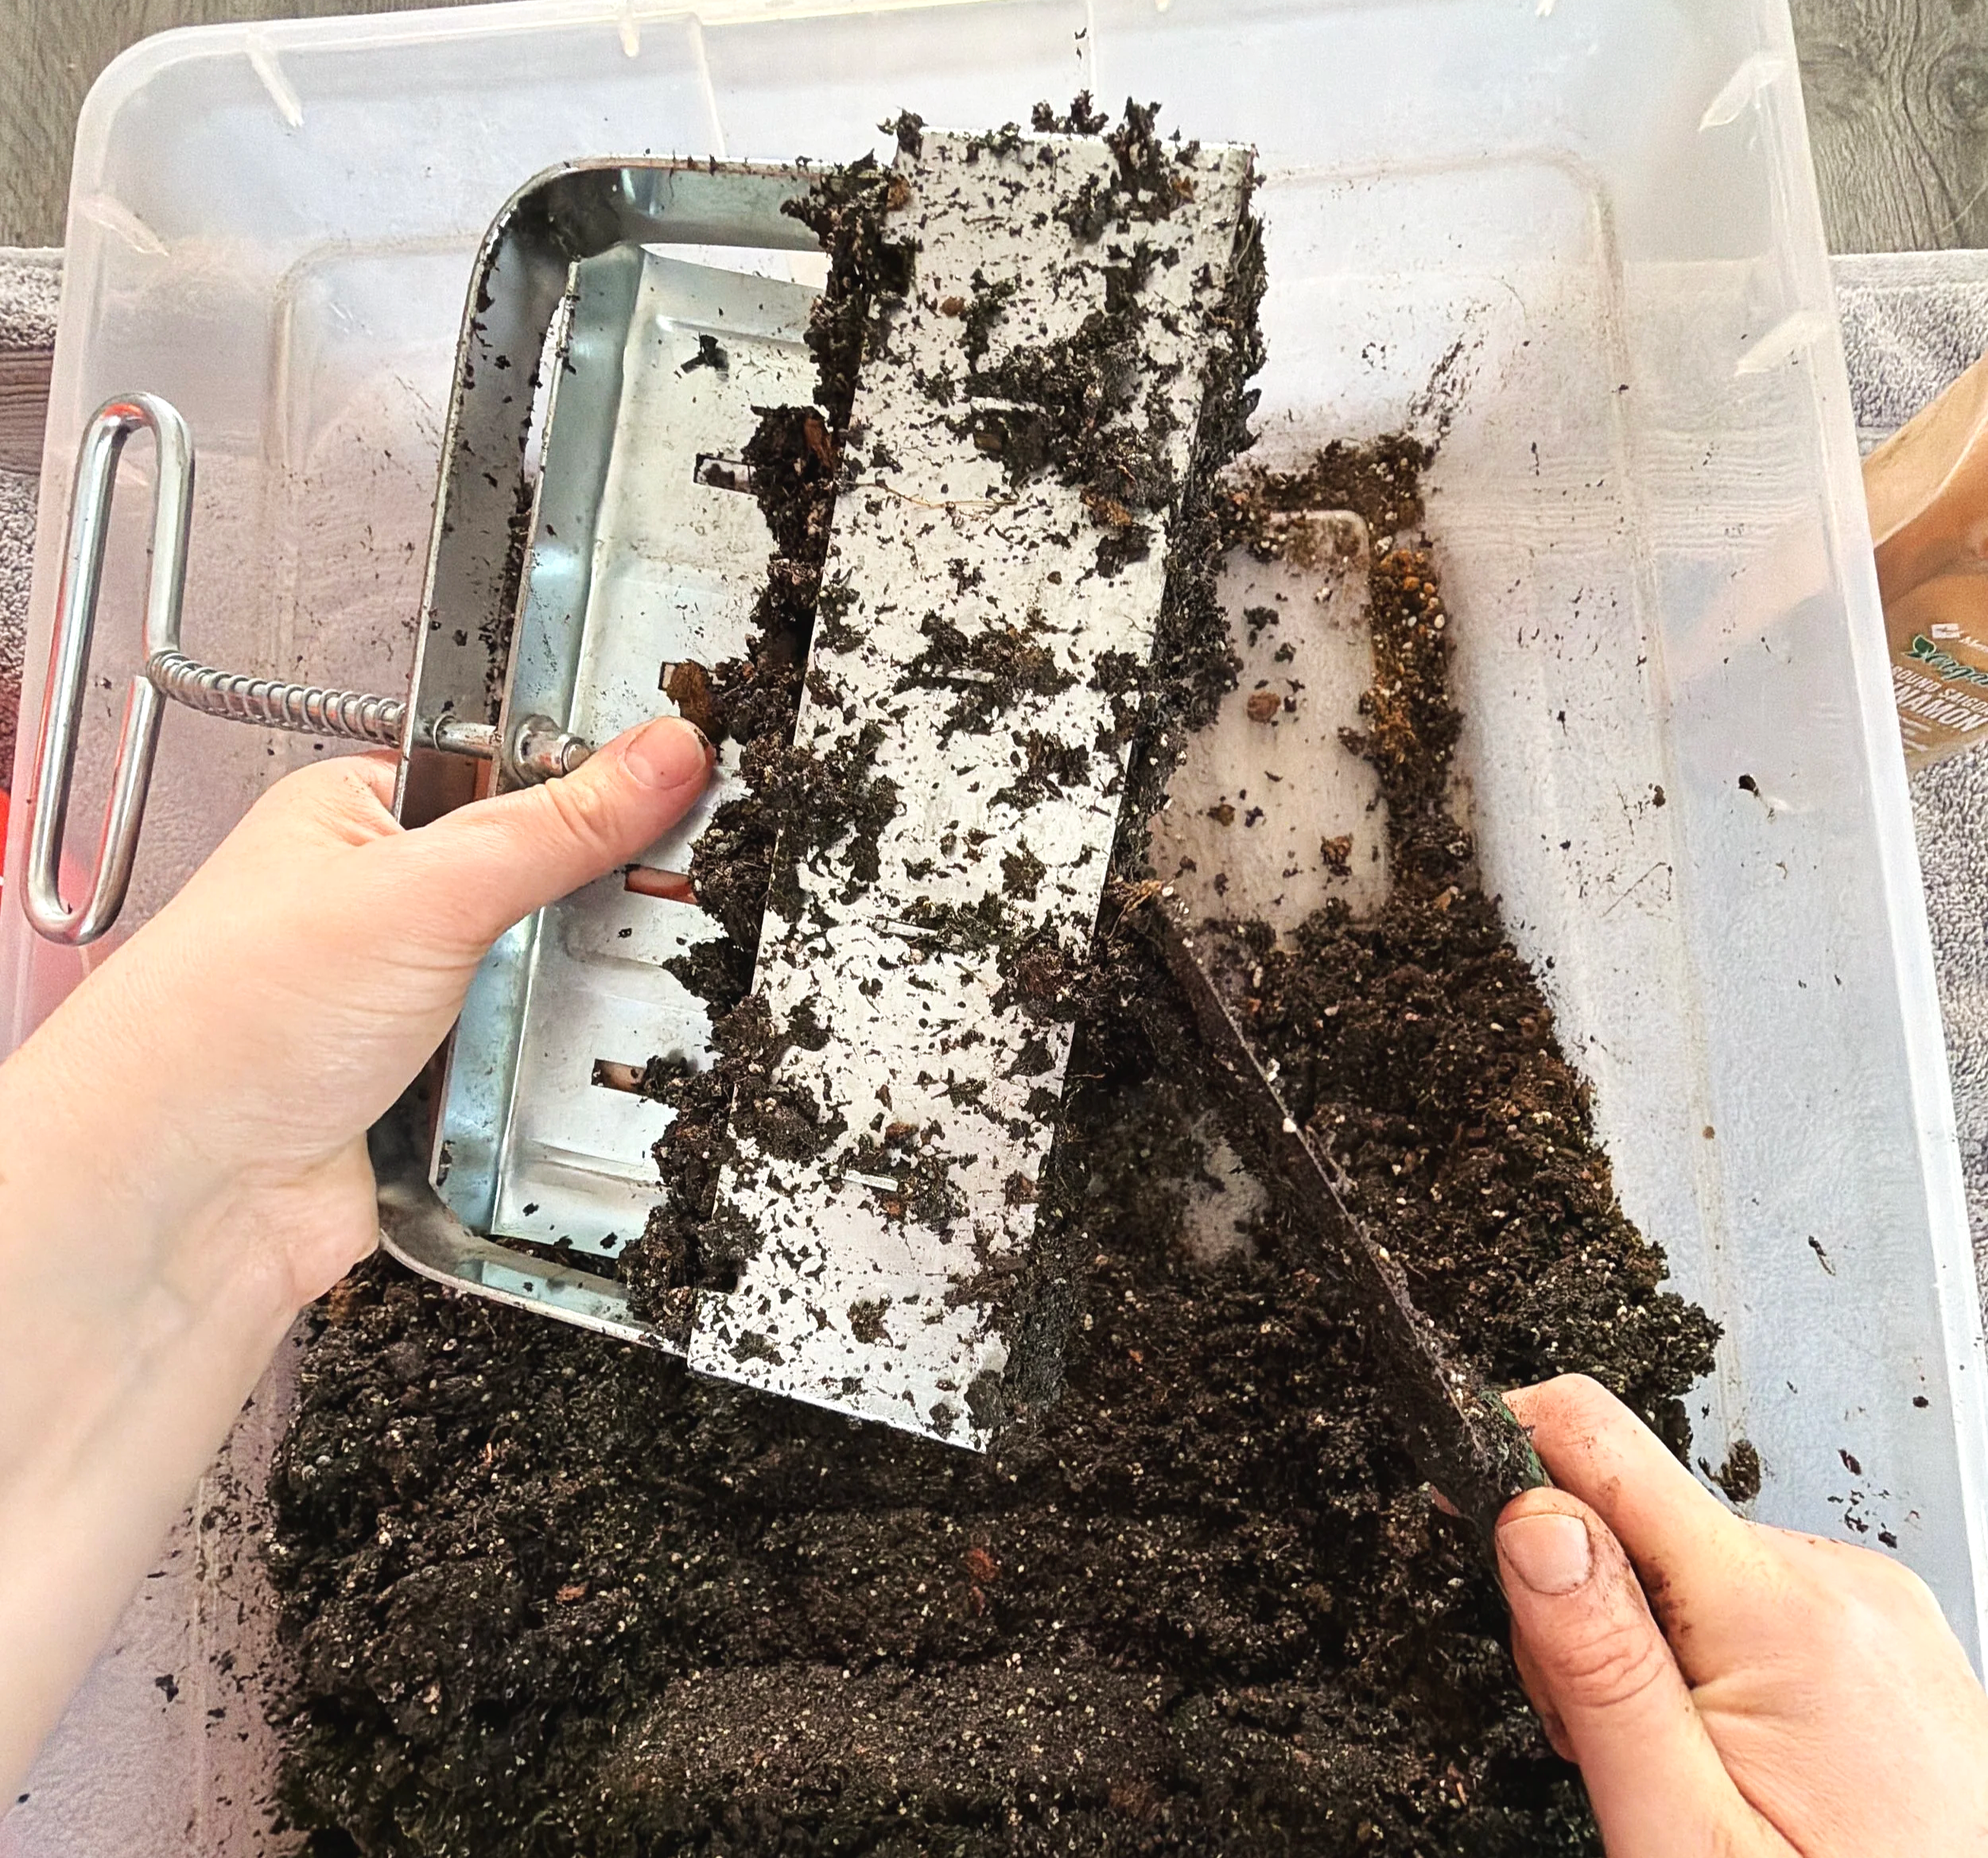
Fill your soil blocker COMPLETELY with soil. You can do this by placing your blocker at an angle and pulling towards you, then pushing down. Repeat this motion 3-5 times until you feel your blocker is full and compact. Then, you’ll take your drywall knife and smooth off the bottom of your blocker. Pro-tip: After I smooth the bottom of my blocker, I then like to push the bottom of the blocker back down into an empty part of my tray to really firm the soil.
Alternatively, if you are not using a blocker, fill a larger rectangular tray with soil and compact it down. Then, you’ll flip the entire tray over onto your flat tray and cut blocks out using your drywall knife.
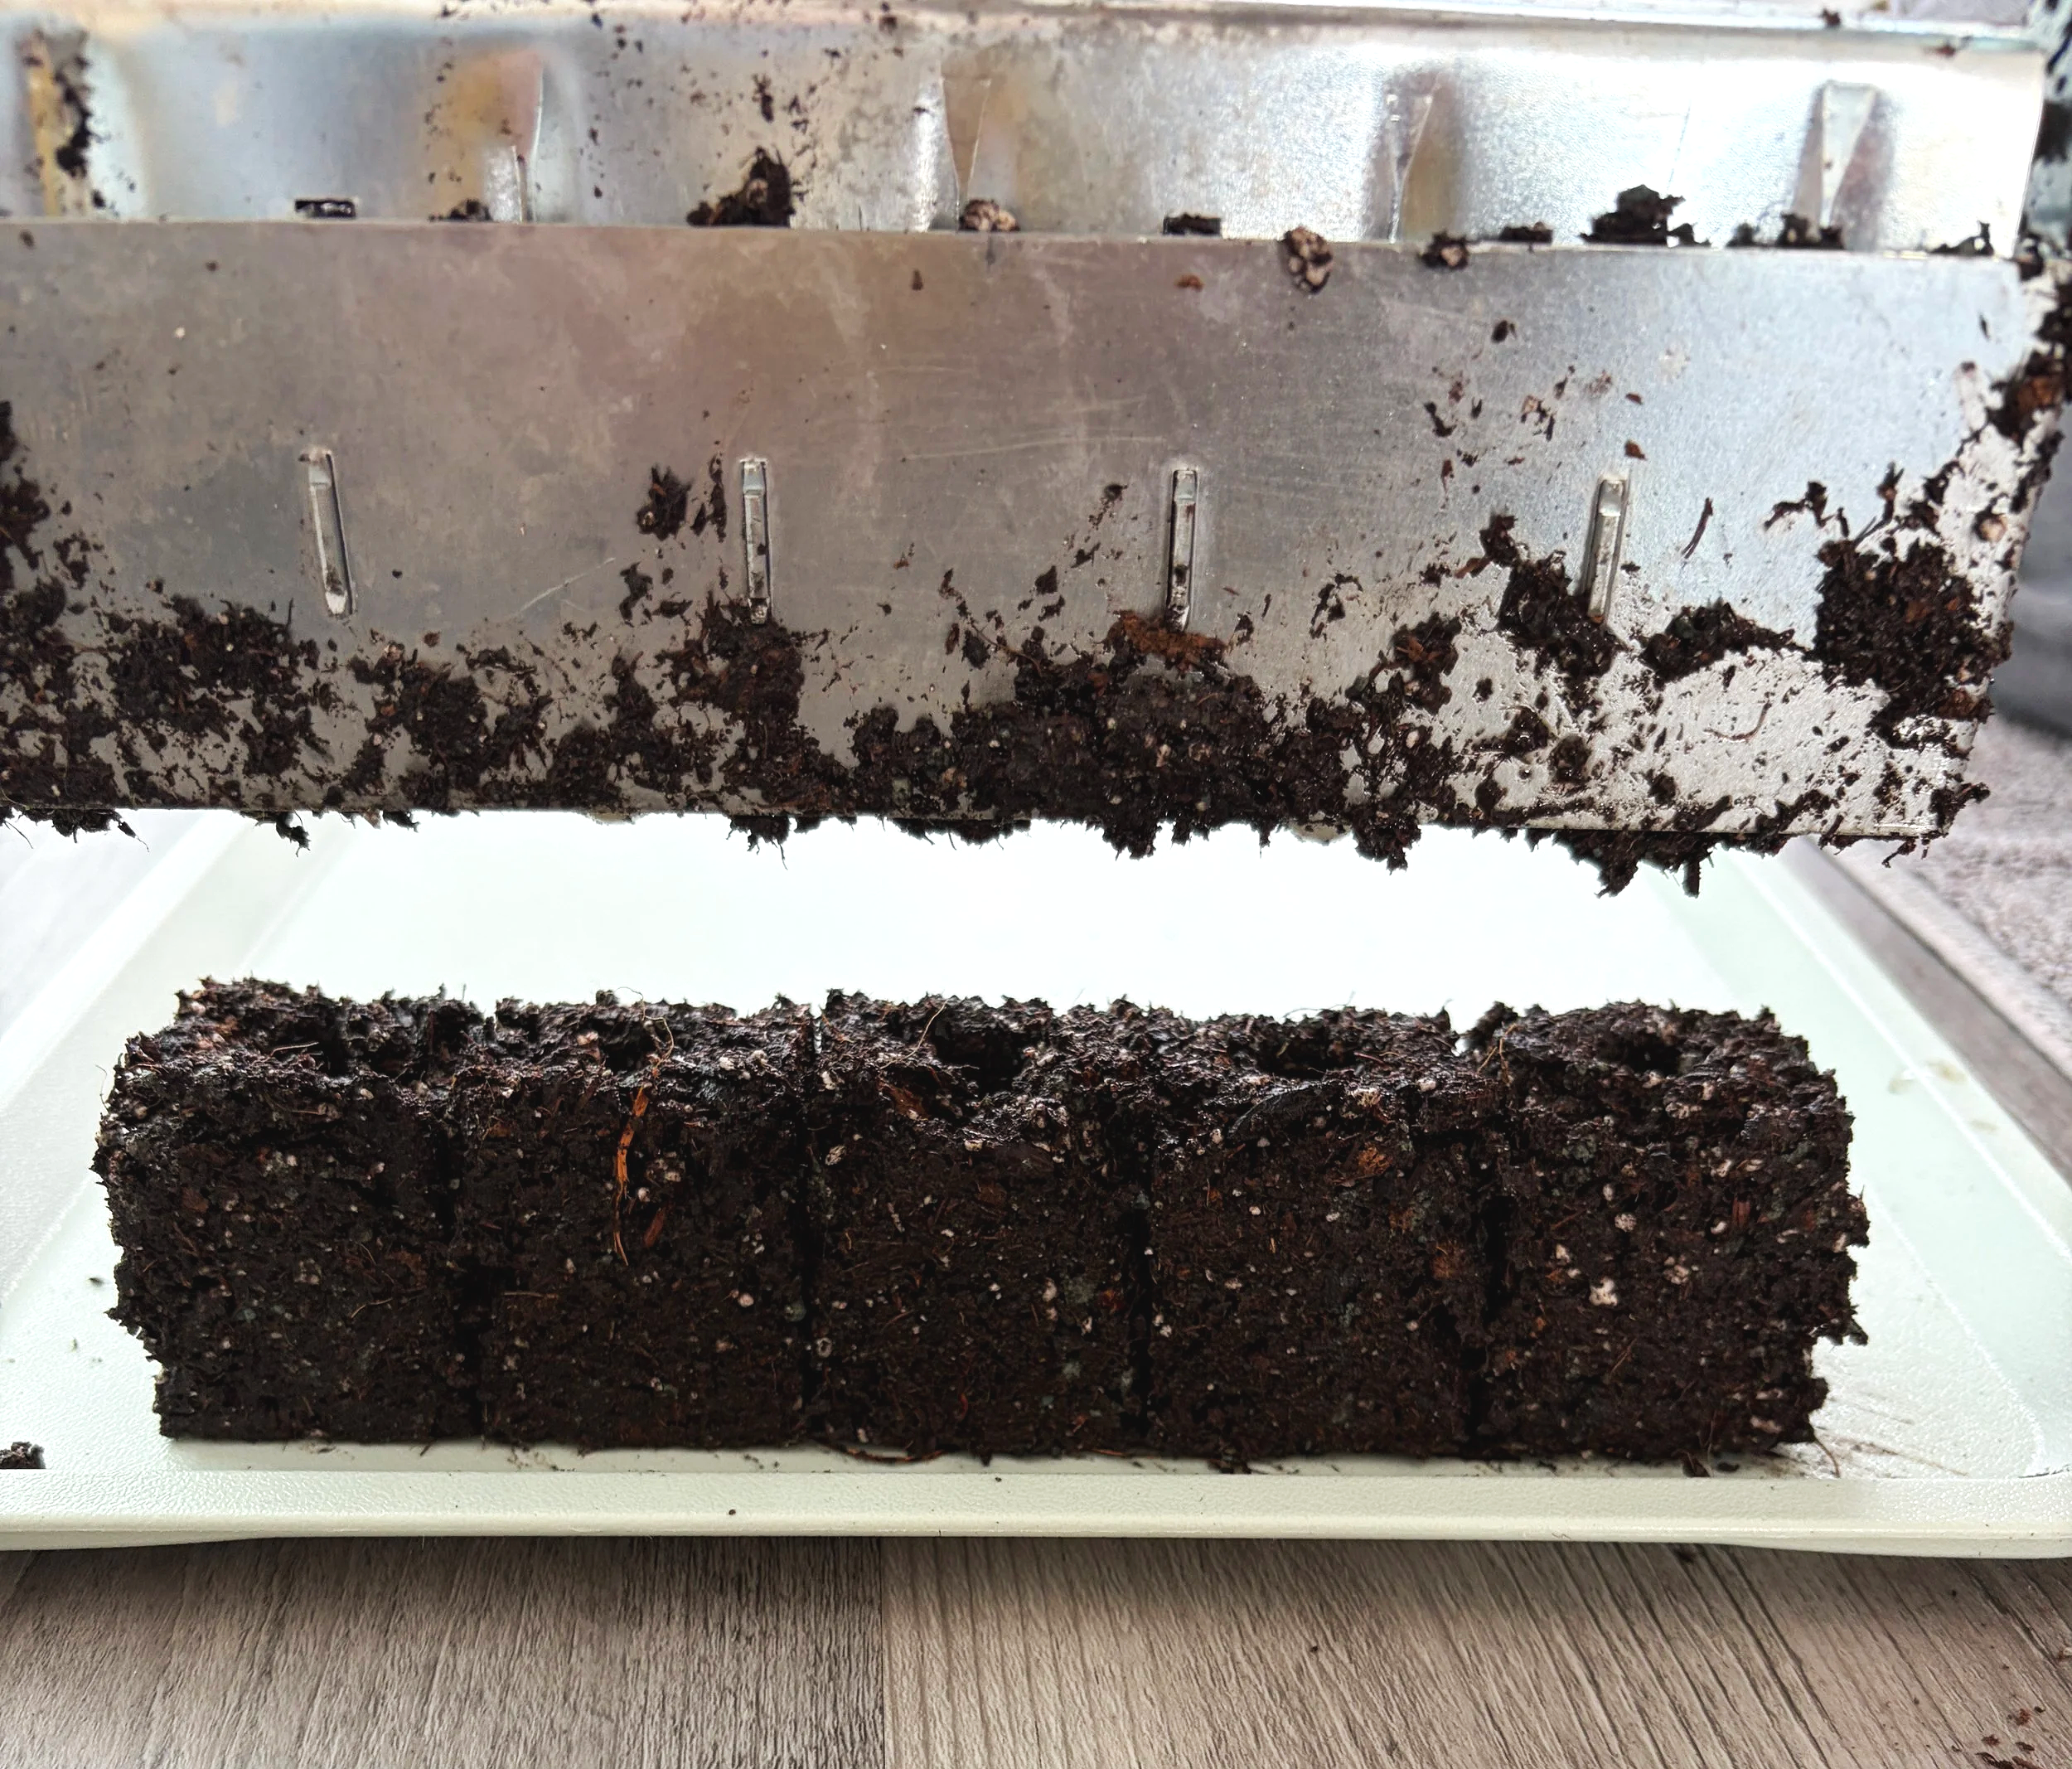
Step 4: Release Your Blocks Onto Your Tray
Place your full blocker onto your flat tray. Squeeze down and gently pull back to release the blocks from the blocker.
If your blocks fall apart, you may not have gotten enough soil into the blocker on the first try. Simply scape them off your tray and reform them. The finished consistency I like to think about is that of a very block-shaped brownie :)
Step 5: Make As Many As You Like
Repeat these steps until you have a full tray or however many trays you’d like to seed into.
Note: Most blockers will have a built in divet created for the seed to be sown into. If you are making your blocks without a blocker, simply take a pencil and create these divets prior to seeding into the blocks.
For a more thorough guide, my soil mix recipe and more details about seedling care and watering, click the photo below to get our FREE Soil Blocking for Beginner Hippies guide